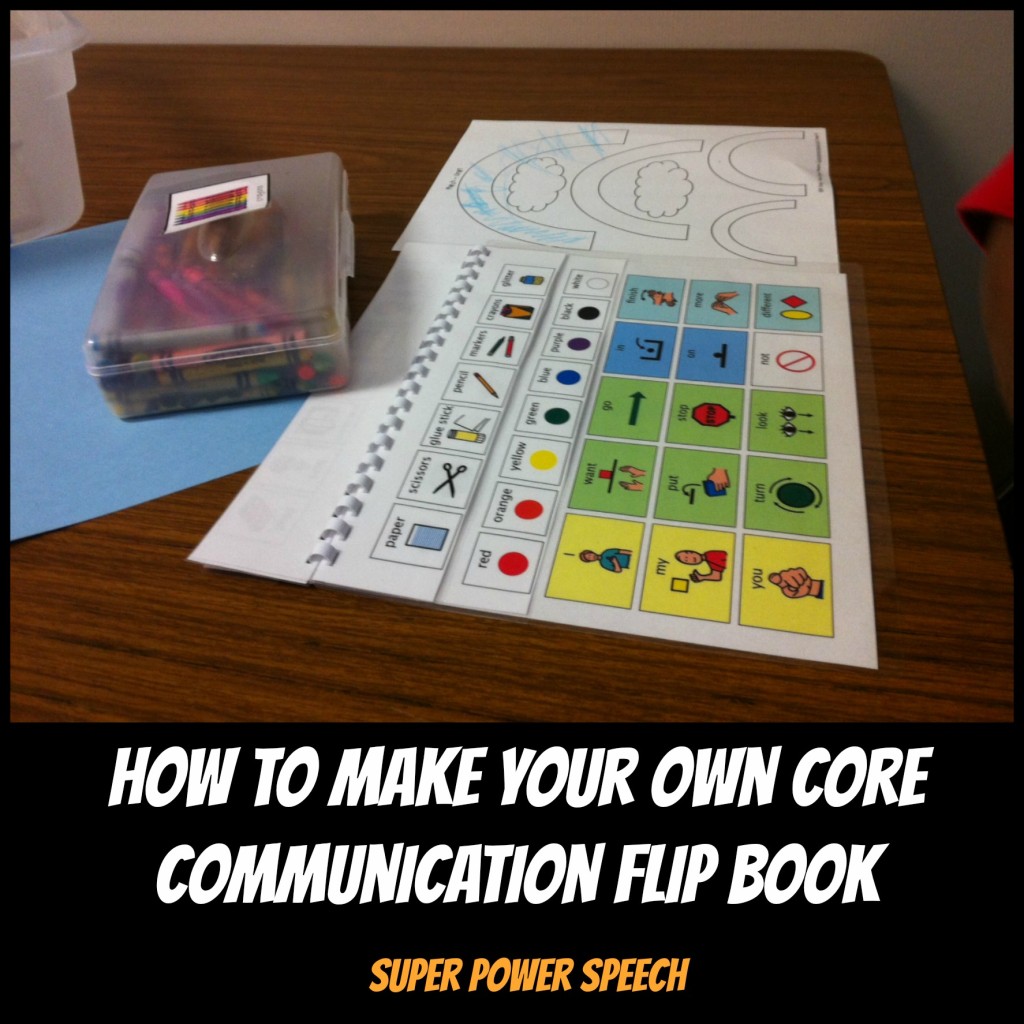
How to Make Your Own Core Communication Flip Book
There was much inquiry into my core communication flip book from last week’s post about Engaging Early Language Learners!
Guess what? I made a version just for you! You don’t want to miss this pre-made communication flip book for all of your communication needs!
Read the updated post here and grab your communication flip book HERE!
My flip book is based on the idea that early language learners need a basic core vocabulary for all activities.
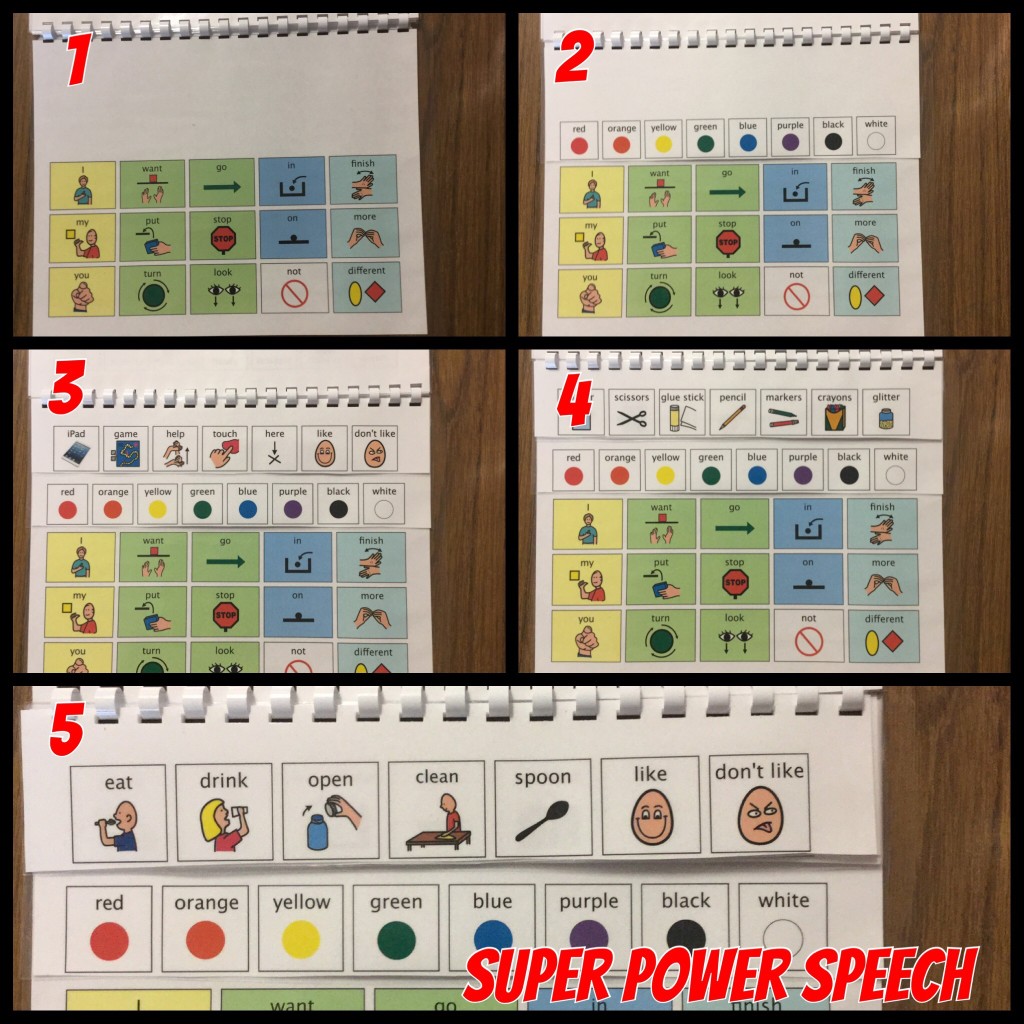
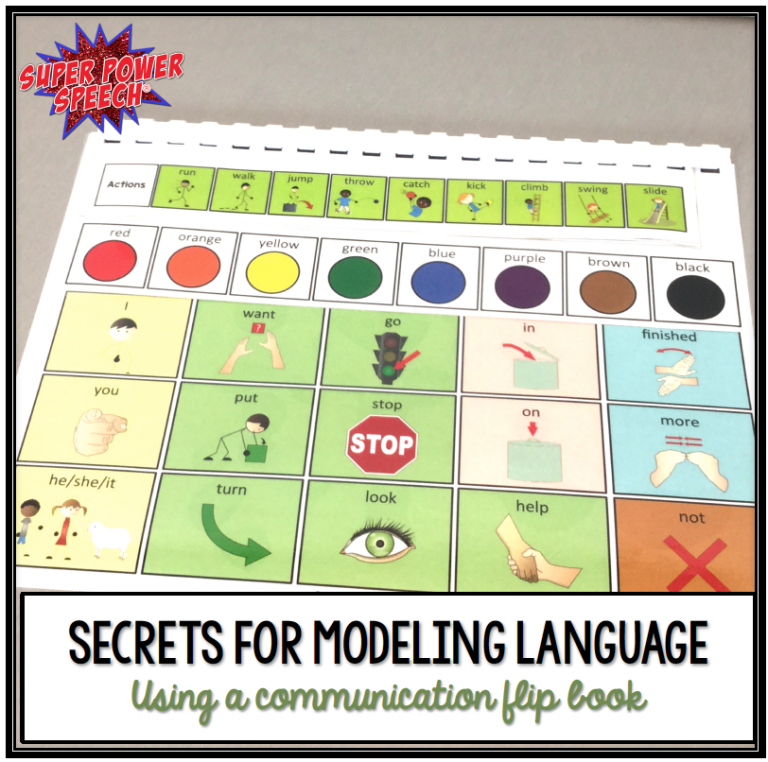
Here is a breakdown of the pages:
1. Core words. I chose 15 words that I felt would be the most useful for basic language activities. The words are color coded using the Modified Fitzgerald Key. The board occupies the lower 2/3 of a sheet of paper so that there is room for fringe vocabulary on top.
2. The fringe vocabulary closest to the core words is colors. These colors are printed lower on the page than the other fringe words so that they can been seen regardless of what is on top of them. Color word vocabulary does not need to be the ever-seen fringe vocabulary. You could choose numbers, letters, or any other frequently used vocabulary.
3-5. Fringe vocabulary strips are then created and stacked on top I have 7 layers of vocabulary including words for: iPad, crafts, work, emotions, books, eating, etc.
After all of the pages were printed, I laminated them, placed them in my desired order, and used comb binding to make it into a flip book.
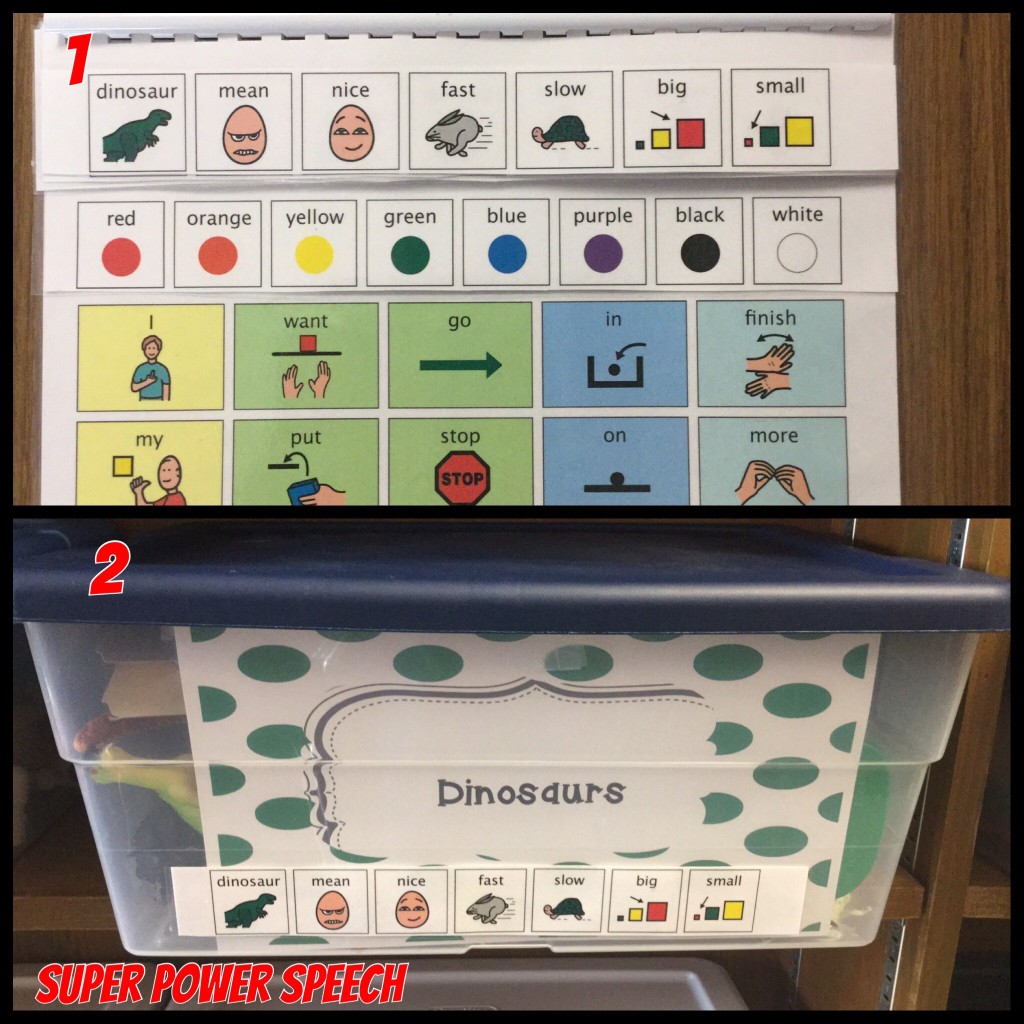
So… that’s cool and all, but what about the REST of the fringe vocabulary? Such as the 20 bins of toys in my room with which I want my students to practice language skills.
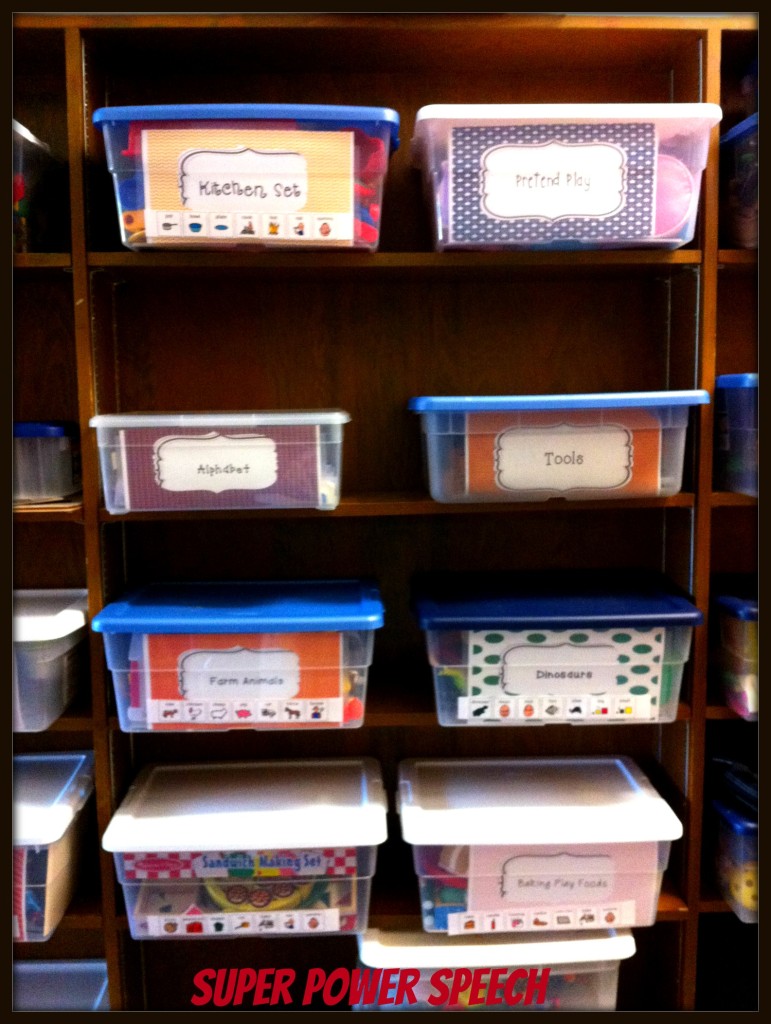
This where I am very proud of myself for thinking outside the box (literally as you’ll see)! I am in the process of creating fringe vocabulary for each of play-based therapy toys. I have stuck them to the outside of the box using (Amazon affiliate link) Tack-It adhesive (Velcro would work too). When I child plays with the items in that box, I peel the strip off of the box and stick it to the top of the communication flip-book. Poof! Instant fringe vocabulary!
I have only been using this flip book for about 2 weeks. It is still in it’s “trial” stage, but I must say that I love it. My plan is to create several more for my SLPAs and self-contained classroom teachers. Changes I plan to make for future flip books include replacing “Not, In, On” with “Help, Like, Don’t Like” on the core page.
What do you think? Is this something you already do or would like to do?

Love it! Thanks for sharing!
We have a smaller version of this, but o really like your setup.
Thank you!
LOVE, LOVE, LOVE the idea!! It might have to be a summer project, but, we’ll see how energized I get before the end of school.
Great informative post! I make similar books using mini and/or large 3-ring binders that have worked really well! I also include the core vocab on the inside base of the binder and then hole punch my smaller laminated fringe vocab pages for easy addition and use of new vocab as we go. To make the book more transportable throughout the day, I run a string or lanyard through the 3 rings. I’ve found them to be very effective low-tech tools!
LOVE it!! This is very helpful – thanks so much!!
What an awesome idea! I like that you put vocabulary strips in with each classroom theme so that they are handy and ready to use at a moments notice. Is their a TPT pack in our future????
Love this!!! Thank you so much for posting about it! Will you have a couple copies through the classrooms for the teachers and kids? Have you tried to make them wearable?
Funny! I do the same thing essentially with a flip ‘n talk that was laying around, use a core board and then the flip n’ talk for the fringe. This could be easily whipped up though, great idea :).
I love your idea!! I make something similar. I do the vocabulary like colors, numbers, shapes, etc and attach them to a page protector after they are laminated. They are attached all around the sides of the page protector. Then, I can put any vocabulary specific to the activity that we are doing inside the page protector. I struggle with how big it gets with all of the vocabulary attached to the sides and top of the page protector. Your idea of having them stacked so you can flip though them is unbelievably awesome!
I LOVE THIS!! Flexible, consistent and streamlined all in one. Thank you for sharing!!
http://www.minspeak.com/teachers/InterventionPlanningArchives.php?PixonProjectResources=1#.VT_KqiFVikr
Try this out. It uses minspeak Pixons (just a different icon set) and represents language in a similar way. and the resources at http://www.minspeak.com/teachers/InterventionPlanningArchives.php?PixonProjectResources=1#.VT_KqiFVikr are free! There are more related resources at gailvantatenhove.com.
Hi…I love your work box task ideas! I am noticing lots of bins labeled dinosaurs, kitchen set, tools, etc. Can you share a little bit about what is inside the boxes and how you use them?
Thanks
I think I’ve talked about those in other posts. They are just my toys separated by category! 🙂
Hey there,
what research are your core language words based from? These seem more thematic based than more traditional core language with fringe vocabulary. thanks
The 15 core words on this board can be found in any of these core vocabulary lists: http://praacticalaac.org/praactical/aac-vocabulary-lists/
Awesome! I feel like this method is very effective in teaching children vocabulary since they’re so reliant on physical representations to learn. Thanks for sharing this neat project!